
As I continue to write helpful how-to guides, I’m slowly realizing that would be a good idea to get back to the basics. That’s why I want talk about how to clean a trombone today.
As it turns out, cleaning a trombone is pretty straightforward. First, you’ll want to take apart your horn and submerge it in a bathtub. Then, you’ll want to snake all the tubing and remove excess buildup from the slides. When you’re finished, rinse the horn and reapply all lubricants. Finally, put the trombone back together and schedule your next cleaning in three months.
Of course, if that wasn’t enough detail for you, feel free to read the remainder of the article.
Trombone Cleaning Steps
In this article, we’ll be looking at a few techniques you can use to clean a trombone. Of course, we’ll be targeting tenor trombones, but these techniques can be used on most brass instruments.
For a high-level look at the process, here are the steps:
- Disassemble the trombone
- Soak the trombone
- Clean the mouthpiece
- Clean all inner surfaces
- Clean all outer surfaces
- Apply lubrication
- Assemble the trombone
- Establish a schedule
Below, you’ll find each of these steps in great detail with links to additional sources to aid in the process.
Step 1: Disassemble the Trombone
Before you do anything, make sure that you’re familiar with the anatomy of your trombone. After all, you will need to take your horn apart, so it’s important that you know how to put it back together. If it helps, consider recording yourself as you take it apart. That way, you have something to reference later.
In general, however, a typical tenor trombone is made up of five major pieces:
- Bell
- Tuning Slide
- Main Outer Slide
- Main Inner Slide
- Mouthpiece
If you have a trigger horn or a bass trombone, you likely have even more moving parts. For instance, pay special attention to extra attachments and tuning slides.
When you’re ready, take the trombone apart and place each piece on a soft surface like a towel to avoid scratching. If you have any issues removing any pieces (like a tuning slide), do not try to force them free. Instead, take the horn to a repair shop.
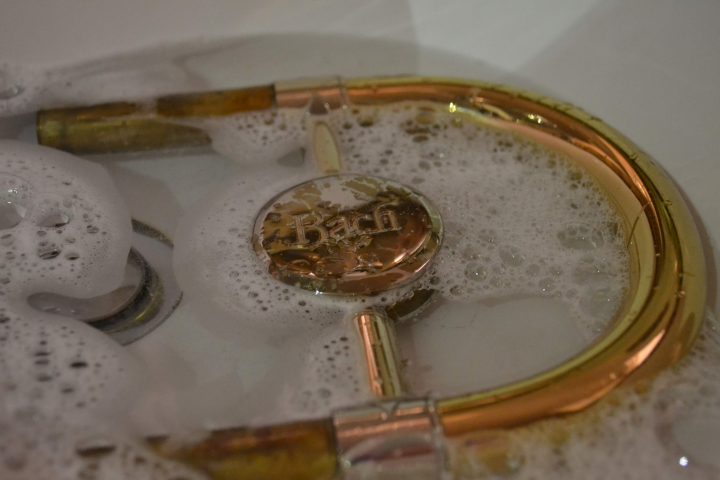
Step 2: Soak the Trombone
Now that you have the trombone disassembled, fill a bathtub or some other large container with warm water and some mild dish soap. In general, you’ll want to be able to submerge each section of your trombone, so bathtubs usually work best. Also, it’s a good idea to lay a towel in the bottom of the bathtub to avoid scratching your horn.
When you’re ready, place each section of the horn into the bathtub until all pieces are submerged. At that point, leave the pieces to soak for about ten minutes. If you’re weary of soaking like some folks, you can always run water over the trombone while actively cleaning it. Of course, for people like me who don’t have a bathtub, running water over the horn is the only practical way of cleaning it.
Regardless, the main idea here is you want to break up the gunk inside the horn with water before you try to use any tools. In the next step, we’ll talk tools.
Step 3: Clean the Mouthpiece
Of all the parts that make up the trombone, the mouthpiece is probably the easiest to clean. As a result, I recommend cleaning it first while the rest of the horn soaks.
To do that, grab a mouthpiece brush or part of a snake and run it through the shank or the tube end of the mouthpiece. While you’re doing this, it’s helpful to run some water over the brush to flush debris as you’re scrubbing. If you want a thorough clean, use some mild dish soap. Never use anything like bleach as it will strip the surface and reveal the underlying metal (been there; done that).
Once you’ve finished cleaning the mouthpiece, set it aside to dry. In the next step, we’ll dive into how to clean the remainder of the horn.
Step 4: Clean All Inner Surfaces
Before you clean the outside of the horn, it’s important to get inside the horn first. That way, your cleaning efforts aren’t a waste of time.
To clean the inside of a trombone, you’ll probably want a snake and a cleaning rod with a metal head. With a snake, you can clean out the curves of the main outer slide and the tuning slides. Meanwhile, the cleaning rod can be used in conjunction with cheesecloth to thoroughly scrub any straight pieces.
In general, you’ll want to run each tool through the tubing for a few minutes to break up more stubborn deposits. If successful, you’ll find that your slides go on easier during assembly.
As you clean the various inner surfaces of your horn, be sure to run water through the tubing to flush any remaining gunk and soap out of the horn. In addition, don’t forget to remove each piece from the bathtub when you’re done cleaning its inner surface.
Step 5: Clean All Outer Surfaces
With all the inner surfaces thoroughly cleaned, it’s a good idea to flush the bathtub of the dirty water. That way, you can continue to use the tub to clean the outer surfaces.
With the tub empty, you can begin rubbing down important outer surfaces like the main inner slide and the tuning slide. Both of these surfaces need to be thoroughly cleaned as they can contain buildup from lubricants and other debris. In many cases, it may be enough to use cheesecloth, but consider using some dish soap.
In some cases, you may find it useful to run a brush over the tuning slide. Unlike the main slide, the tuning slide doesn’t get as much work, so it may have some mineral buildup. Of course, you would have already noticed this while taking the tuning slide off.
As you rinse off the outer surfaces, take a soft cloth and hand dry them. Then, set each piece aside, and let them air dry for at least 30 minutes.
Step 6: Apply Lubrication
With the trombone completely clean, you can begin assembling the slides. However, you’ll want to apply your favorite lubricant first.
For the main slide, first apply your favorite lubricant to the stockings (the fatter ends) of the inner slide. Then, work the lubrication on one end at a time using the outer slide and a twisting motion. When the lubrication is thoroughly applied, spray the slide with some water.
If you’re not sure how to apply your specific brand of lubrication, I have a few guides you can check out:
Also, if you’re in the market for a new slide lubricant, I have an article on that as well. To summarize, the three main lubricants I recommend are Slide-O-Mix, Trombotine, and Superslick. Of course, the manufacturer of your horn may have better recommendations.
For the tuning slide, you’ll want to use slide grease—not slide oil or slide cream—to lubricate the tuning slide. To apply slide grease, there’s a slightly different process which I have documented.
In short, the process for applying the grease is similar to the main slide. Specifically, make sure to apply a small amount of grease around the circumference of each tube. Then, work the grease on one tube at a time using a twisting motion. When there’s an even coating on both tubes, put the tuning slide in playing position and wipe away excess grease.
Step 7: Assemble the Trombone
When both slides are in position, you can finish assembly. In particular, I recommend putting the entire horn together as if you were going to play it. That way, you can ensure that horn works. For example, you’ll want to make sure that you didn’t break your water key or slide lock in the process of cleaning the horn.
To assemble the horn, replace all slides as mentioned previously. Then, attach the main slide to the bell and place the mouthpiece in position. If everything went smoothly, you should be able to operate all moving parts as expected. In addition, you should be able to produce quality sounds.
Step 8: Establish a Schedule
At this point, your horn should be in good shape. If your horn was in particularly bad shape before the cleaning, it might be a good idea to create a cleaning schedule. Depending on how often you use the horn, you should be shooting for a cleaning at least twice a year.
If you follow a regular cleaning schedule, you’ll extend the life of your horn considerably, and you’ll limit repair trips. Of course, if you run into any problems during the cleaning process, it’s not a bad idea to take your horn to a repair shop. There’s no shame in that!
Summary
In short, the best way to clean a trombone is to give it a good bath and reapply all the lubrication. Of course, you may find it useful to record yourself during the disassembly process, so you don’t forget how to put your trombone back together.
At any rate, thanks again for taking some time to learn about trombone care and maintenance. In the future, I’ll be looking to extend this article to include specific references for lubrication and other maintenance tips like greasing a tuning slide.
As always, don’t forget to respect the brass!